Service and maintenance for PRV's

In an industry where pressure reducing valves play a vital role in maximising flow and maintaining pressure, it’s important to consider the servicing options to ensure your Bermad valve is always at its optimal performance.
What is a pressure reducing valve?
A pressure reducing valve is a hydraulically actuated pressure reduction valve that will automatically modulate using water pressure to maintain a constant downstream pressure regardless of inlet pressure and flow rate.
A pressure reducing valve like the Bermad model 720EN incorporates a series of hydraulic pilots, speed controllers, filters, and other accessories to ensure that the hydraulic valve automatically modulates.
Check out the following video to see the workings of a pressure reducing valve:
How often should you perform regular maintenance for the valve to be reliable?
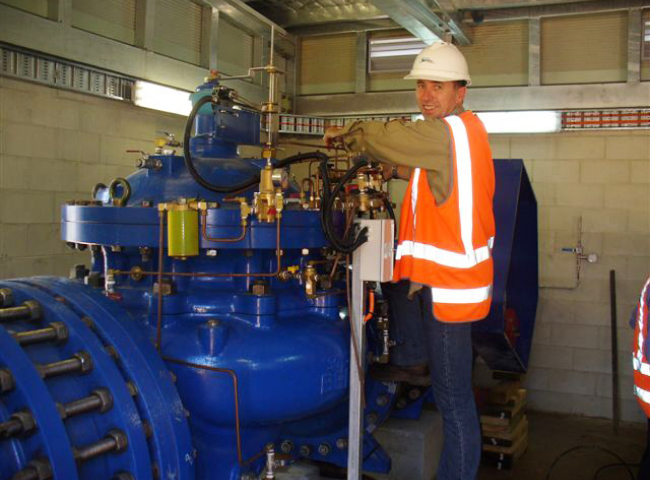
When it comes to performing regular maintenance on pressure reducing valves, timing is everything. Like you would service your motor car to prevent failure of components, it’s critical to do preventative maintenance on a pressure reduction valve to ensure reliable and accurate operation.
Maintenance intervals are very much dependant on several different operation conditions. Conditions that will impact the valve performance include:
- Quality of water in use in application, e.g., drinking water, untreated river, dam water, etc.
- The frequency of operation, i.e., a valve may be in stand-by mode or could be in a continuous operation 24/7.
- The hydraulic conditions: if the valve is in a high differentia, high risk application, there could be components that are subject to cavitation or excessive wear if not serviced at the correct intervals.
In best engineering practice, preventative maintenance is recommended for every 6-12 months that the valve is in operation. This involves the basic service of the key components without going into the valve body itself.
Major servicing of the valves should be considered every 6-10 years, which includes internal inspection of the main valve as well as the external components.

What are the key service components on a minor service?
A regular service can usually be done quickly without taking the entire valve offline.
To ensure the valve is operating at maximal performance there are four key considerations that are critical to the valve’s operation:
- Needle valve setting and wear.
The needle valve or fixed restriction in a pressure reduction valve plays the role of controlling the speed of operation and is essential to always be clean and functional.
- Control ports on the inlet, outlet, and bonnet.
For the valve to enable to flow, it is essential that the ports on the valve are clean and functional. In older valves, in certain water conditions, these ports can be prone to blockages.
- Filter maintenance.
For optimal performance, it is essential that the control filter remains clean. The control filter protects the needle valve and pilot mechanism against debris blocking the control ports.
- Control chamber flushing.
Over extended periods of time, mud and silt will build up in the control chamber of the valve. Prior to peak season, it’s imperative that this debris is flushed out of the valve to avoid contaminating the pilot mechanism.
Experience has proven that these four specific components in the PRV are maintained, the reliability of the valve is extremely high.
Learn more about the process of maintaining the model 720EN control valve in the video below:
What is involved in a major service of a PRV?
If the valve has been correctly sized and designed from the start, a major service is where the internals of the valve are inspected. A major service of a pressure reducing valve generally occurs after six years of the valve being in operation.
When a major service is undertaken, the valve is turned offline, and the entire actuator is removed from the valve. The following video shows how to remove the actuator:
The key areas to inspect or replace when the actuator is out is as follows:
- Check the inner body around the seat for signs of wear or cavitation damage.
- Check the resilient seal on the lower seal disc for wear or damage to the rubber.
- Check the inner diaphragm inside the upper side of the actuator and replace if necessary.
- Check the inner bearing for signs of wear and leakage
- Check the indicator (if fitted) for leakage through the shaft.
To learn how to disassemble the control valve from start to finish, check-out the video below:
Looking for additional support? We’re here to help.
Here at Bermad, we’re committed to providing the information you need for products, technology, and operating systems. That’s why we’re committed to ensuring that users of our pressure reducing valves have the best information on the functions of all our products.
If you have any further questions, require additional details, or wish to discuss any technical aspects of the air release valve, you can:
- Visit the 720-EN valve product page to find all the relevant data, including: data sheets, engineering assistance, 2D &3D cad drawings, manuals, case studies, spare parts, operational videos.
- Visit the Bermad training facility to get hands on training on the pressure reducing valve.
- Contact our nearest sales office for discussions with our trained Bermad personnel.
- Use our live field support to assist in the operation of any valve.
Make enquiry
Online Enquiry Close


In an industry where pressure reducing valves play a vital role in maximising flow and maintaining pressure, it’s important to consider the servicing options to ensure your Bermad valve is always at its optimal performance.
What is a pressure reducing valve?
A pressure reducing valve is a hydraulically actuated pressure reduction valve that will automatically modulate using water pressure to maintain a constant downstream pressure regardless of inlet pressure and flow rate.
A pressure reducing valve like the Bermad model 720EN incorporates a series of hydraulic pilots, speed controllers, filters, and other accessories to ensure that the hydraulic valve automatically modulates.
Check out the following video to see the workings of a pressure reducing valve:
How often should you perform regular maintenance for the valve to be reliable?
When it comes to performing regular maintenance on pressure reducing valves, timing is everything. Like you would service your motor car to prevent failure of components, it’s critical to do preventative maintenance on a pressure reduction valve to ensure reliable and accurate operation.
Maintenance intervals are very much dependant on several different operation conditions. Conditions that will impact the valve performance include:
- Quality of water in use in application, e.g., drinking water, untreated river, dam water, etc.
- The frequency of operation, i.e., a valve may be in stand-by mode or could be in a continuous operation 24/7.
- The hydraulic conditions: if the valve is in a high differentia, high risk application, there could be components that are subject to cavitation or excessive wear if not serviced at the correct intervals.
In best engineering practice, preventative maintenance is recommended for every 6-12 months that the valve is in operation. This involves the basic service of the key components without going into the valve body itself.
Major servicing of the valves should be considered every 6-10 years, which includes internal inspection of the main valve as well as the external components.
What are the key service components on a minor service?
A regular service can usually be done quickly without taking the entire valve offline.
To ensure the valve is operating at maximal performance there are four key considerations that are critical to the valve’s operation:
- Needle valve setting and wear.
The needle valve or fixed restriction in a pressure reduction valve plays the role of controlling the speed of operation and is essential to always be clean and functional. - Control ports on the inlet, outlet, and bonnet.
For the valve to enable to flow, it is essential that the ports on the valve are clean and functional. In older valves, in certain water conditions, these ports can be prone to blockages.
- Filter maintenance.
For optimal performance, it is essential that the control filter remains clean. The control filter protects the needle valve and pilot mechanism against debris blocking the control ports.
- Control chamber flushing.
Over extended periods of time, mud and silt will build up in the control chamber of the valve. Prior to peak season, it’s imperative that this debris is flushed out of the valve to avoid contaminating the pilot mechanism.
Experience has proven that these four specific components in the PRV are maintained, the reliability of the valve is extremely high.
Learn more about the process of maintaining the model 720EN control valve in the video below:
What is involved in a major service of a PRV?
If the valve has been correctly sized and designed from the start, a major service is where the internals of the valve are inspected. A major service of a pressure reducing valve generally occurs after six years of the valve being in operation.
When a major service is undertaken, the valve is turned offline, and the entire actuator is removed from the valve. The following video shows how to remove the actuator:
The key areas to inspect or replace when the actuator is out is as follows:
- Check the inner body around the seat for signs of wear or cavitation damage.
- Check the resilient seal on the lower seal disc for wear or damage to the rubber.
- Check the inner diaphragm inside the upper side of the actuator and replace if necessary.
- Check the inner bearing for signs of wear and leakage
- Check the indicator (if fitted) for leakage through the shaft.
To learn how to disassemble the control valve from start to finish, check-out the video below:
Looking for additional support? We’re here to help.
Here at Bermad, we’re committed to providing the information you need for products, technology, and operating systems. That’s why we’re committed to ensuring that users of our pressure reducing valves have the best information on the functions of all our products.
If you have any further questions, require additional details, or wish to discuss any technical aspects of the air release valve, you can:
- Visit the 720-EN valve product page to find all the relevant data, including: data sheets, engineering assistance, 2D &3D cad drawings, manuals, case studies, spare parts, operational videos.
- Visit the Bermad training facility to get hands on training on the pressure reducing valve.
- Contact our nearest sales office for discussions with our trained Bermad personnel.
- Use our live field support to assist in the operation of any valve.


